How to Get Your Drawing Back After You Hit Dont Save on Art Rage Lite
Get started with ArtRage

Get started with ArtRage
01. Get set up in ArtRage
02. Set up a brush
03. Selection your colours
ArtRage is a digital art app that enables that enables you to utilise real-globe painting techniques on your computer, tablet or mobile phone. Information technology has gained popularity for its ability to realistically mimic traditional mediums such as oil paints and watercolours, via an easy-to-employ interface. ArtRage is available on Windows and macOS, as well equally Android and iOS phones and tablets. In this article, we'll run through everything you lot need to know to get started with ArtRage.
Want to see how it stacks up against the contest? Explore our guides to the best iPad art apps for painting and sketching and the best digital art software.
- The all-time tablets with a stylus for cartoon and note-taking
The current version of the tool is ArtRage 6, released in 2019. With this update comes several changes to the Custom Castor, including the ability to customise pigment depth, a new Eraser mode, and the ability to import Photoshop standard bitmap brush heads. At that place'southward a new Complementary Colors feature to provide yous with colour palette inspiration, and interface updates to make the tool more than usable. Learn what nosotros thought of the previous version in our ArtRage 5 review.
The tool costs $79 – and there are discounts bachelor if you lot use an older or 'Lite' version of ArtRage and want to upgrade.
Click the icon in the superlative right of each image to enlarge it
Get set up in ArtRage
Let's start with some basic tips to help you get set up before y'all start painting. In this section, we'll explain how to create your sail, including setting the size and surface texture.
01. Open a new canvas
(Image: © Phil Galloway / ArtRage)
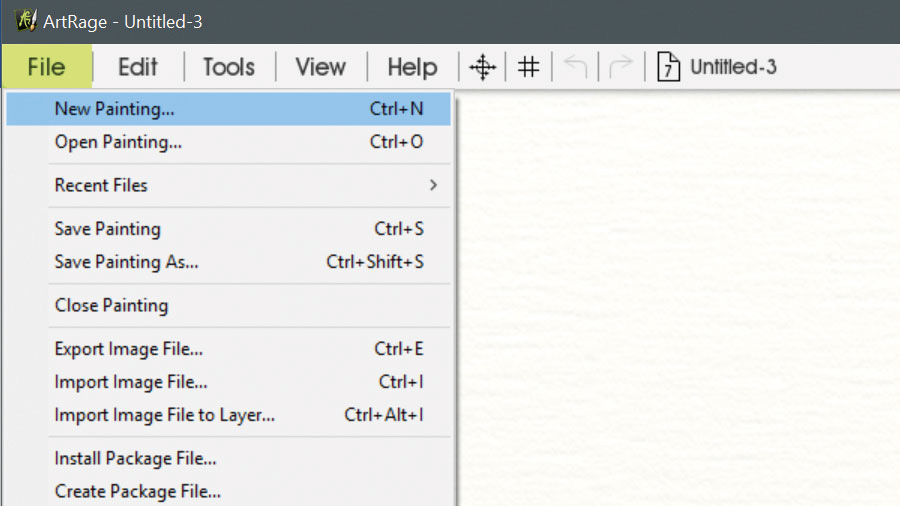
When starting whatever new piece of art, you first need to create a new blank canvas. ArtRage gives yous a vast array of options to customise your sail, from color, size and pixels right through to the texture of the surface that you'll be working on. Begin past clicking File in the summit left corner and selecting New Painting.
02. Choose your canvas size
(Image: © Phil Galloway / ArtRage)
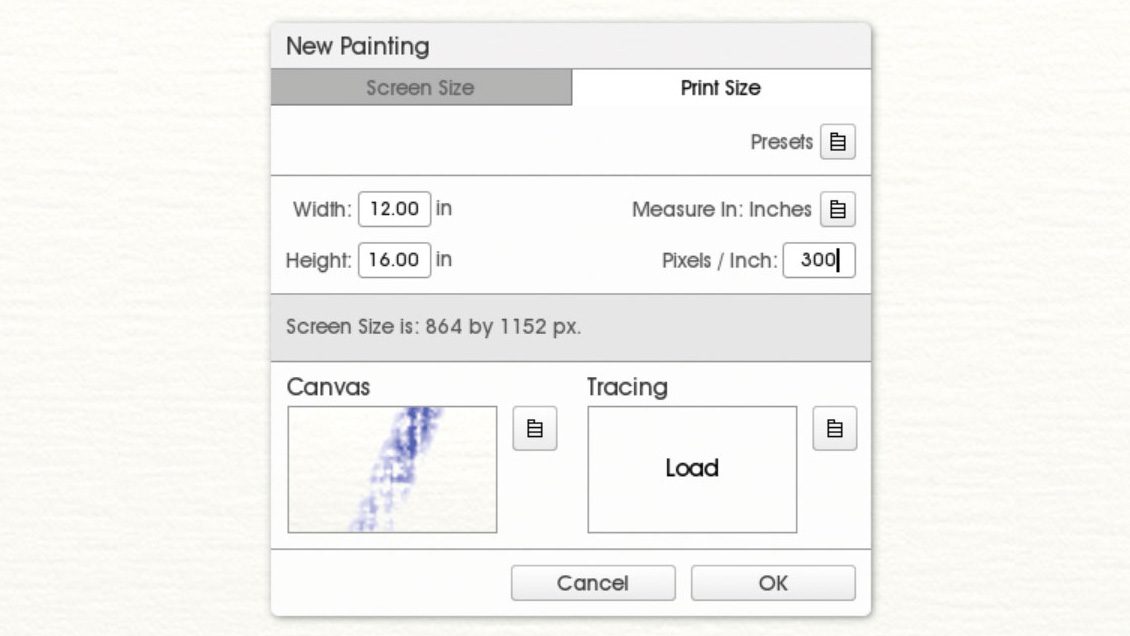
The New Painting box volition open and y'all'll run into a range of options to choose from. Don't be daunted, it's simply your chance to selection the size and color of paper to work on. Select your print size and set the dimensions – e.yard. 16x12 inches for A3. When first trying out the app, we'd recommend sticking to smaller paper sizes. This style you can hands fill the space with colour using the medium-sized default brushes. Click in the Pixels/Inch box and type 300 to ensure a detailed picture show.
03. Select a canvas texture
(Image: © Phil Galloway / ArtRage)
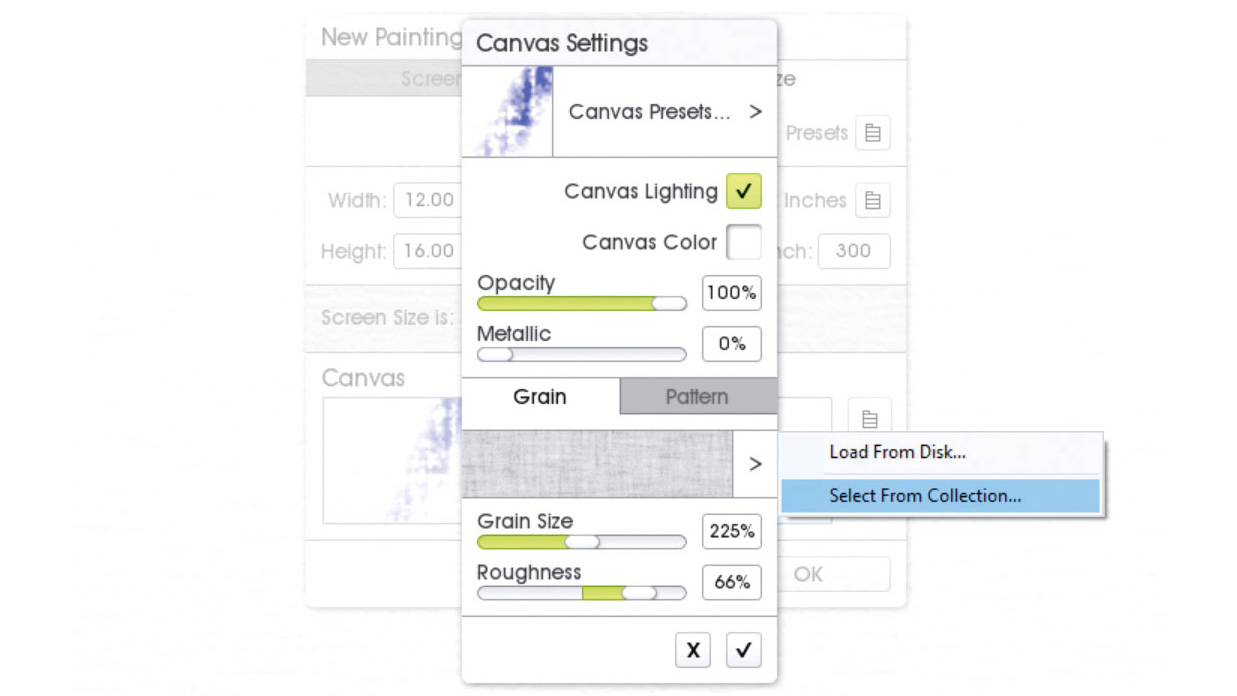
Tap in the canvas box that shows a blueish stroke beyond it. Hither you can change the colour of the surface, forth with the grain size and the roughness. If you tap on the arrow pointing right underneath the Grain tab, and select Select from collection, you lot're and so given fifty-fifty more options and textures.
04. Confirm canvas and begin painting
(Image: © Phil Galloway / ArtRage)
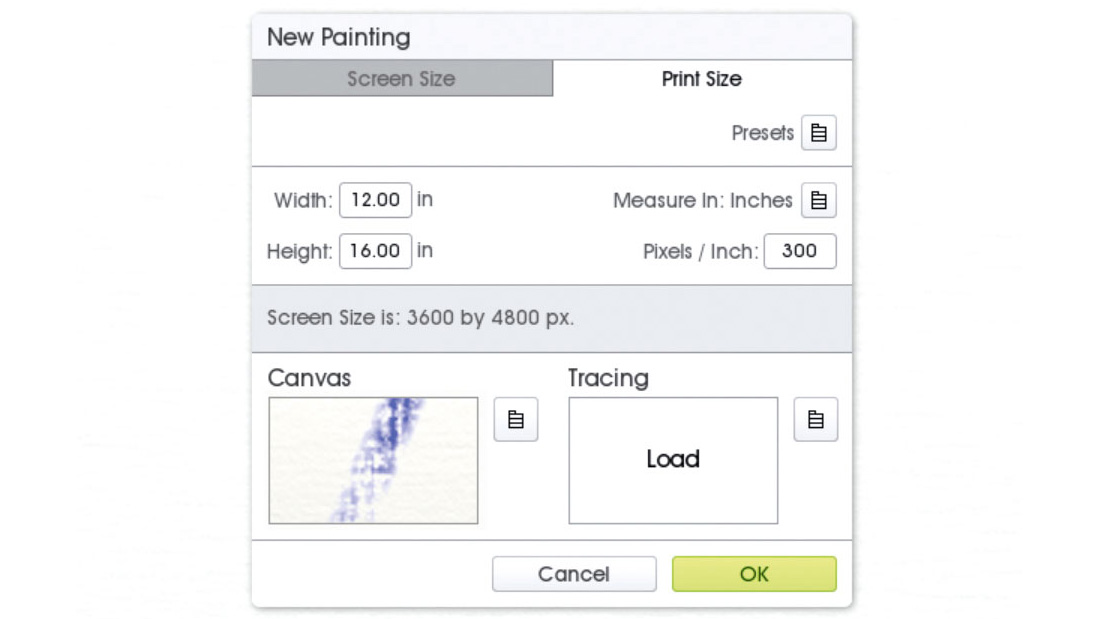
Once yous're happy with your choices for the surface and texture of the canvas, simply click the tick button and this will bring yous back to the Sizing screen. Click the OK button if all looks good for you. At present your fresh sheet volition appear, gear up to exist worked on.
Set your brush
One time y'all've got your canvas gear up upward, it's time to outset working with brushes. The beauty of ArtRage is that you tin apply the stylus as yous would a existent paintbrush – mix fast, emotive strokes with gentle, feathering dabs, or any approach suits you lot. In this section, we'll show you how to select a brush in ArtRage, change the size, load it up with paint, and create texture as y'all would if you were working traditionally.
05. Select an oil castor
(Image: © Phil Galloway / ArtRage)
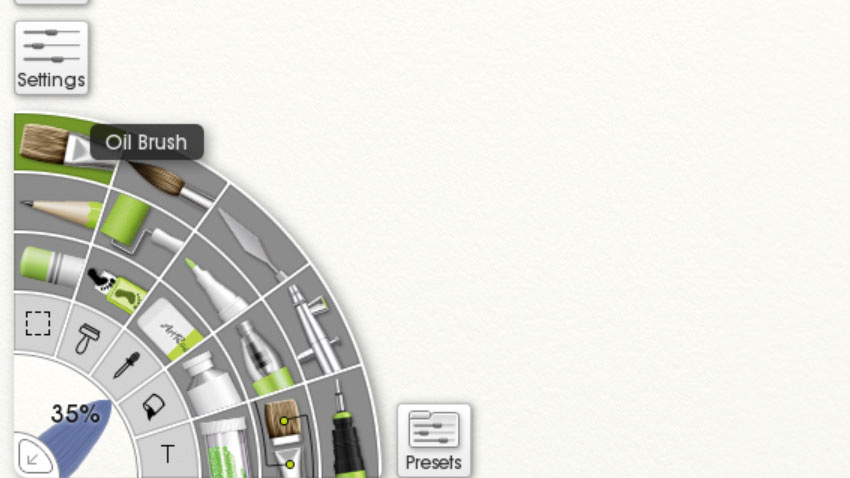
The Medium Picker/Tool selector is probably the virtually of import interface element on your screen. This is the hub from which you can select what medium or tool you'll be working in, and at that place are plenty of tools to choose from. To choice your chosen medium or tool, just hover your cursor/stylus over the tools to exist told what they are, then tap or click to select.
06. Change your castor size
(Image: © Phil Galloway / ArtRage)
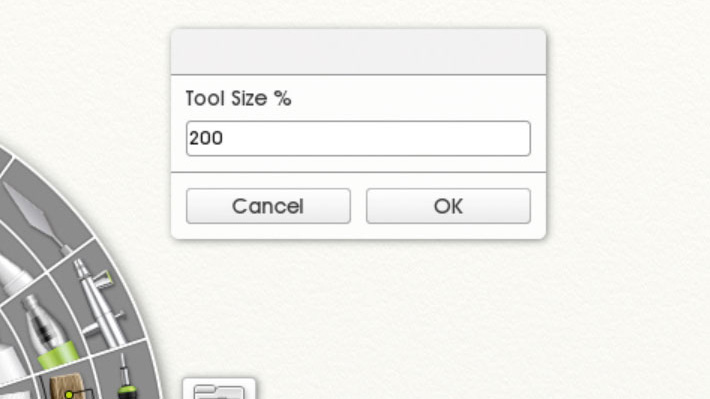
Drag your finger, cursor or stylus across the brush head to adjust the size of your brush – become to the right to increase the size, and left to decrease. The percentage number volition change to indicate where yous are on the size calibration. To pick a specific size or become larger nonetheless, just tap in the brush head area and type in the number you need.
07. Load paint on your brush
(Epitome: © Phil Galloway / ArtRage)
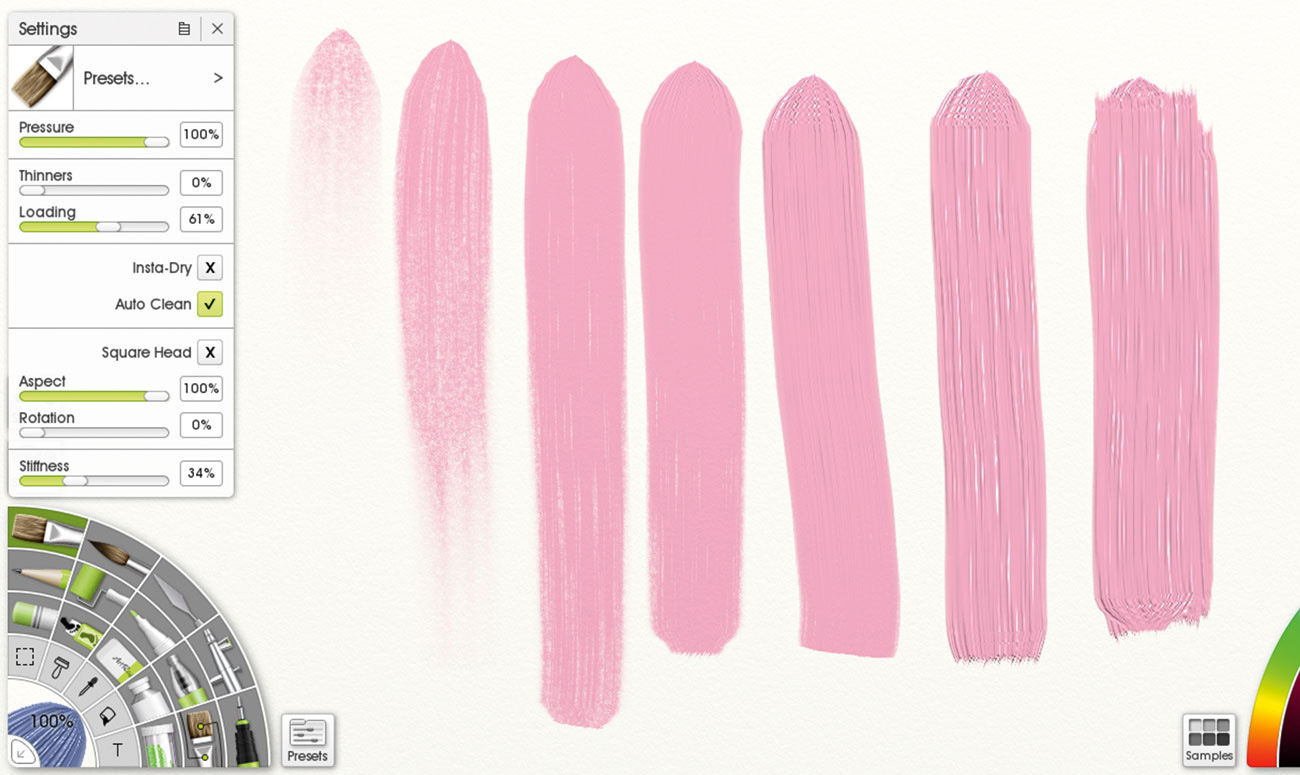
Side by side yous'll desire to load your brush up with paint. You'll find your options under Settings. For a actually dry dab of paint, you lot'll want a Loading value of between two and nine per cent – this is great for underpaintings and sketching. Slide the Loading upwards to 50-80 per cent for a much thicker, sleeky stroke that you can you tin can mix on the sail, alla prima-fashion.
08. Introduce texture
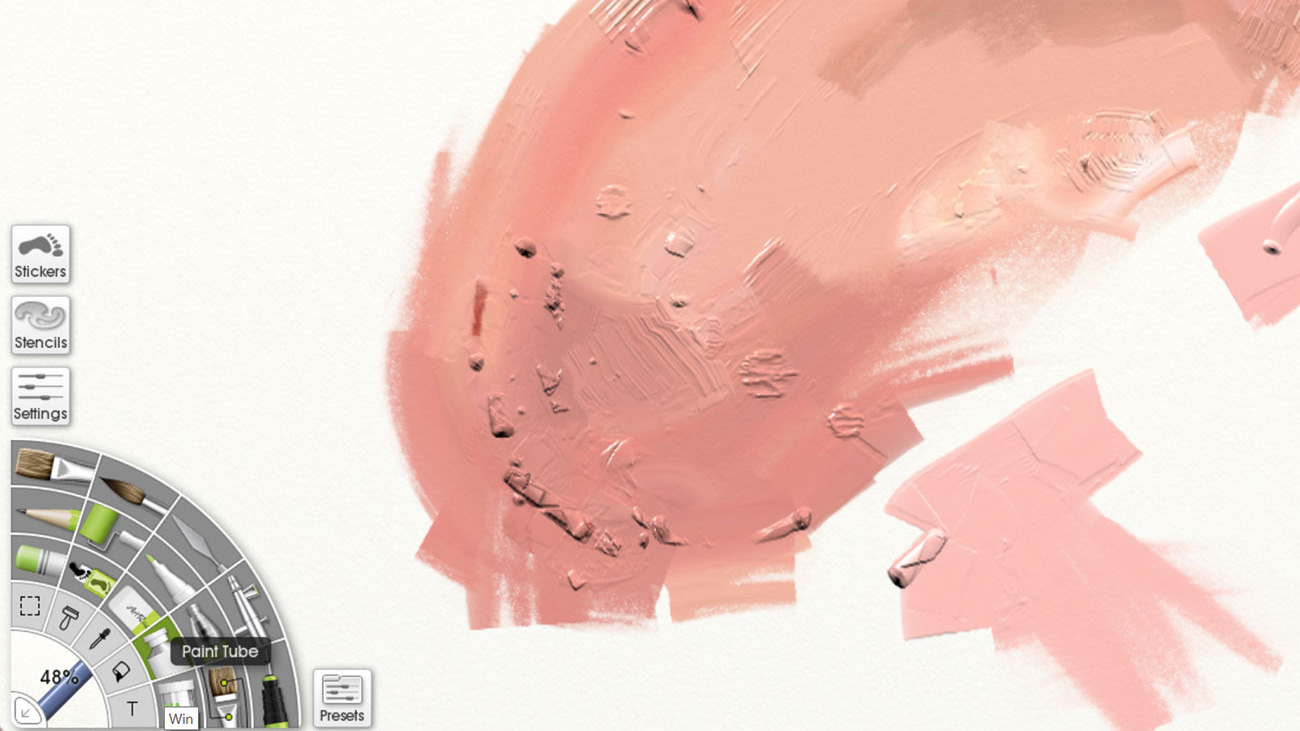
(Image: © Phil Galloway / ArtRage)
You can add together actress texture by laying down paint directly from the tube and smearing it with the Palette pocketknife. To practise this, select the paint tube and utilise splodges on the canvas almost your brush strokes. Then push the paint with the Palette pocketknife, edifice it up on the edges of your strokes. This is a smashing way to create added realism and depth.
Choice your colours
The final step in getting set in ArtRage is learning how to selection and adjust your colours. In this section, you'll learn how to cull a color and tone, impact up any errors using the Eraser tool, and undo strokes you're not happy with.
09. Choose a color and tone
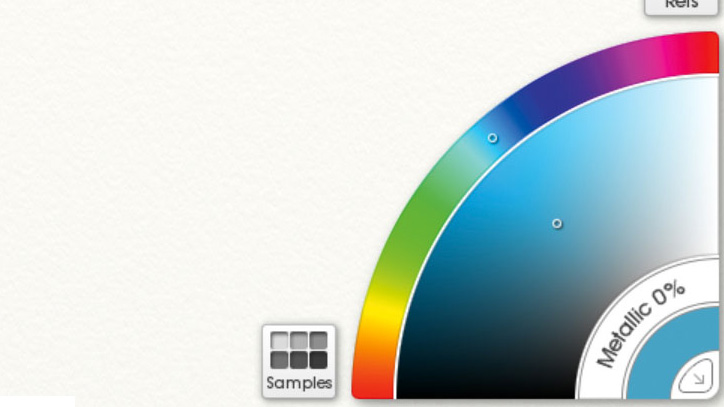
(Prototype: © Phil Galloway / ArtRage)
With ArtRage, at that place's no more than endlessly mixing palettes and striving for an odd shade! On the bottom-right of your screen you'll find the Colour Cycle, where y'all can quickly select hues across the whole colour spectrum. Information technology's very simple and there's not an expensive tube of paint in sight!
Tap the outer bike to select the general colour you want. Using the middle band you lot can click to select a tone within your initial colour option, ranging from pale, subtle colours correct through to rich and deep hues. The smallest bicycle shows the color currently selected and the arrow in the corner enables you to collapse the Color Picker, giving you more room to paint on your screen.
x. Correct errors with the Eraser
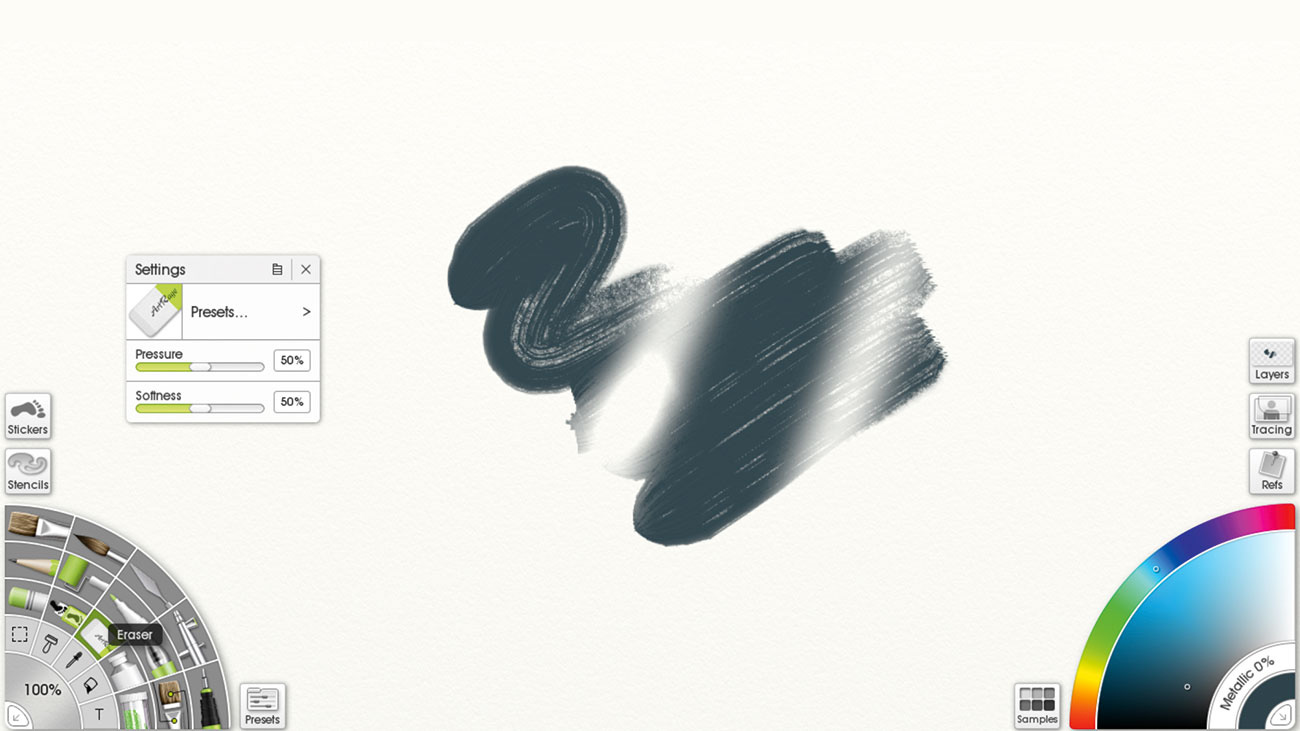
(Image: © Phil Galloway / ArtRage)
The Eraser, institute in the Tool Picker menu, is ideal for loose smudges, shaping areas or when sketching. Like the other tools, the Eraser has adjustable settings for altering the Pressure and Softness. Only click the Eraser and utilise on your sheet as yous would a normal condom.
11. Undo previous actions

(Image: © Phil Galloway / ArtRage)
The alternative method of correcting a mistake is the Undo push button. This is located at the acme of the screen and resembles a backwards arrow. If you lot find you've gone astray in your work, click the Undo push button to take y'all back to a point at which yous were happy with your fine art.
Related articles:
- The best drawing tablet: Our pick of the best graphics tablets in 2020
- Create a custom sticker brush in ArtRage
- How to create a digital oil painting using ArtRage
Related articles
Source: https://www.creativebloq.com/how-to/get-started-with-artrage
0 Response to "How to Get Your Drawing Back After You Hit Dont Save on Art Rage Lite"
Post a Comment